Showing posts with label Ecofriendly. Show all posts

Tuesday, December 11, 2012

Cone Christmas Tree Made From Recycled Cardboard

If any of you use Pinterest, you've probably seen the super adorable cone Christmas trees all over it. I saw some last year and thought they were neat, but after looking at the cardboard cones at Hobby Lobby and seeing that they're kind of expensive for this project, I decided that if I wanted to make a cone tree, I better figure out how to make my own cone to use. Luckily I had some practice making cones (I'll post the project later) for baby bear's first birthday party hats. Being an avid recycler and tree-hugger, I have a bunch of boxboard hanging around in "limbo," waiting to be taken to the recycling center. Bam. Free cone. Here's the scoop:

What you'll need:
- Cardboard (I used a cereal box and got a 12" tree, so bigger box if you want a larger tree, smaller box for a smaller tree)
- Yarn/twine/something in the string family
- Modpodge
- Scissors
- Elmer's glue
- Paper clip/Binder clip

How to:
1. Cut open your box so it lays completely flat.

2. Cut off all of the little tab edges so you have a clean rectangle.


3. Fold two of the corners toward each other, keeping the printed side of the box to the inside and roll the rectangle into a cone. 


4. Unless you're an origami genius, you probably have a tail on the bottom of your cone like I ended up with. Cut that tail off and cut around the base of the cone so that you have an even base. 


5. Using your binder clip or heavy duty paper clip, secure the cone. Spread some glue into the seam, covering the whole height of the cone, and let it dry. 


6. Spread some modpodge around the base of the cone and start wrapping your spring around, pressing it into the modpodge and making sure that the edges of the string are touching with each layer you add. Keep adding modpodge and string until the entire cone has been wrapped.

7. Cut the string from the ball/spool about 4" from where it ends on the cone to leave a tail. Put the tail through the little opening at the top.
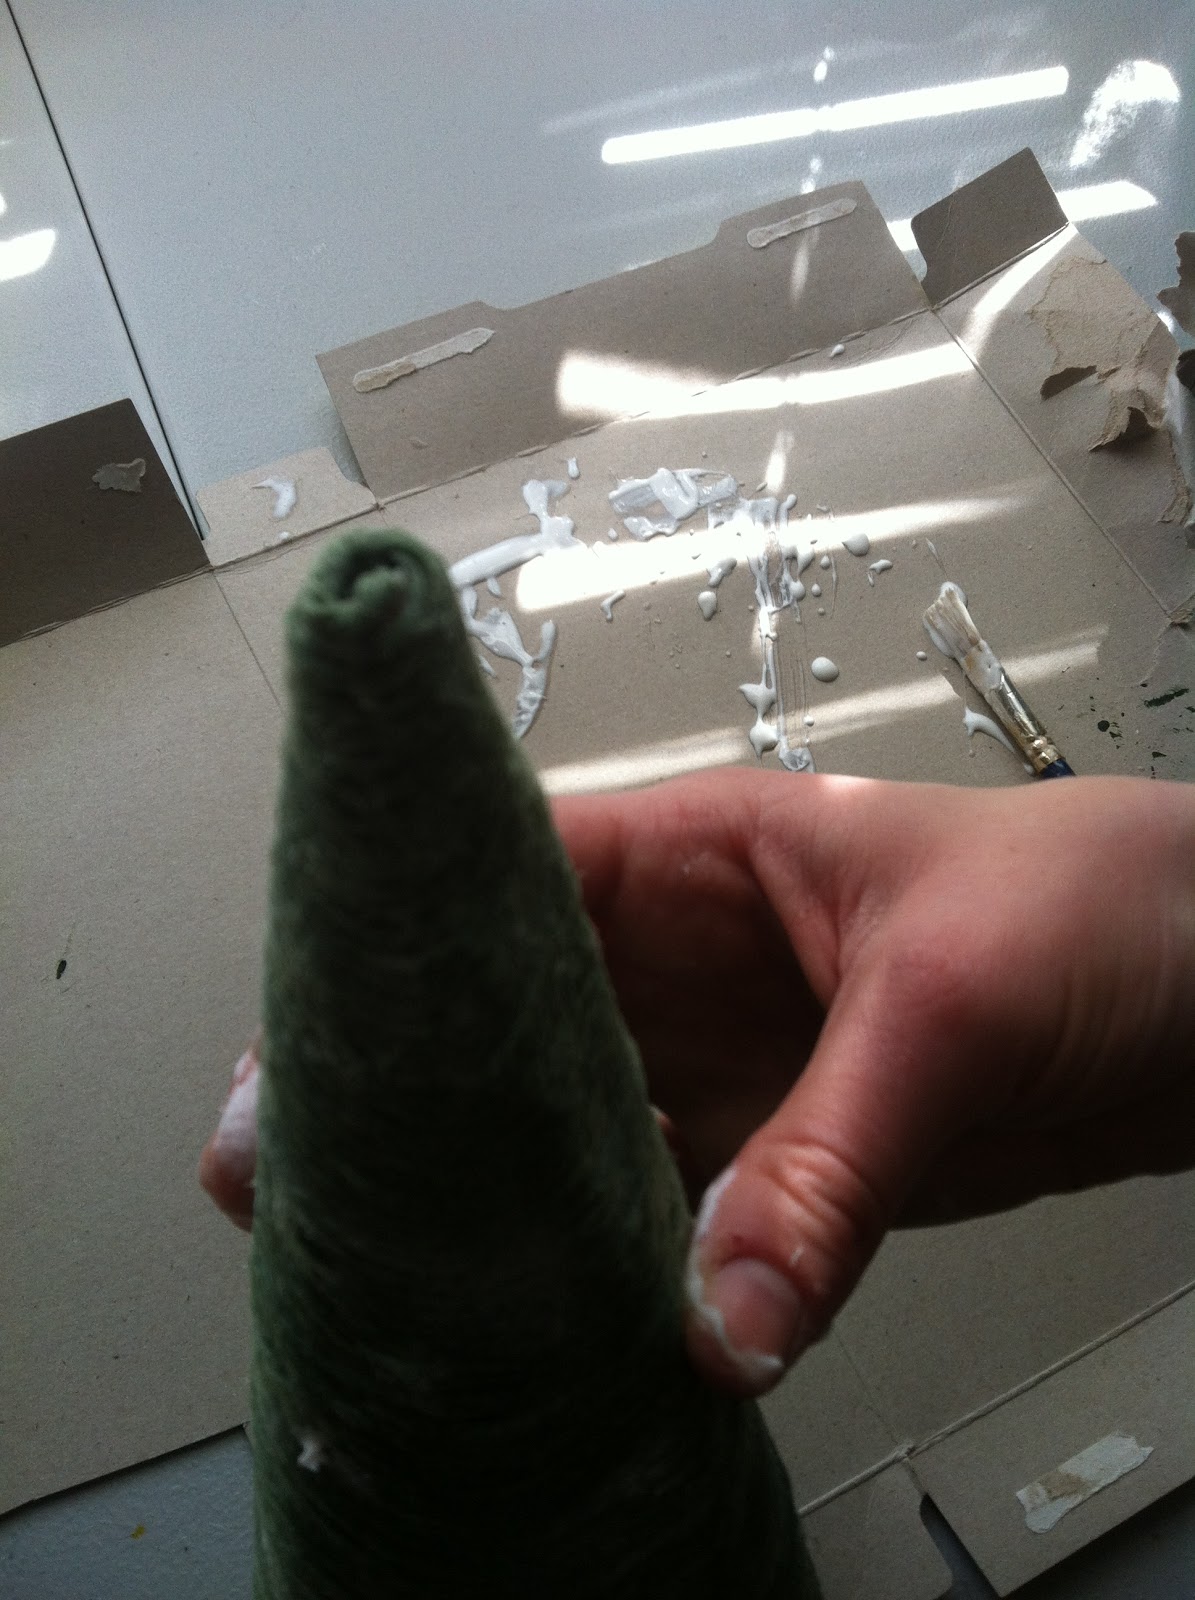
8. You should see the tail inside of the cone, hanging like this.


9. Ta-da! Let the tree dry for a few hours and go peel the 8 extra layers of glue "skin" off of your fingers. 


I added a snowflake button to the top of mine to hide the lumpy top. Cone tree found a nice home next to my sticks in a vase with fake cranberries, our snowman candle from Holland House Candles and a snowman figurine my mom donated to the cause a few years ago. PS: whoever designed the dry bar in my house obviously was male because it's SO awkward and impossible to decorate nicely.


Tuesday, November 27, 2012

Pinecone Christmas Trees

This might be the easiest project ever. It would be great to do with kids, too. Take them on a pinecone hunt to find the supplies!

What you'll need:
- Pinecones (flat bottomed pinecones work best for this project since they will need to stand up on their own)
- Cardboard (boxboard from a cereal box works great for this)
- Marker (I used a metallic marker)
- Glue (Elmer's works fine)

How to:
1. Draw a star on the non-printed side of your cardboard. Fold the cardboard in half and cut out the star so that you cut two identical stars at once. Glue the printed sides of the cardboard together and let dry.
2. Color both sides of the star with the marker, making sure to color the edges too. 
3. Place star on top of pinecone, glue it on or just let it sit free. 

I added fake cranberries to one of my "trees," so things like sequins, glitter, gemstones, etc. would make fun personalized touches! 


Thursday, June 7, 2012

Reusable "Paper" Towel

Between having a baby, dog and husband, I use lots of paper towel to clean up messes. To be fair, I'm probably the worst offender with the kitchen mess making, especially when the blender is involved in the project. When I realized that we're literally using a roll a week, which is unbelievably wasteful, I decided that it was time to do something about it. Pinterest yet again delivered with ideas for reusable paper towel, modified to meet my needs :) Since my needs usually call for a half-sheet of paper towel, I made mine in half-sheet size. I finished this project early this week and started using the cloth towels, and let me tell you, they ROCK. One sheet of Bounty doesn't have anything on terry cloth! I also made a wet bag to hang on my stove and collect the dirty towels until it's time to wash them.


Reusable Paper Towel
Materials:
- 1 1/2 yards of terry cloth material
- 1 1/2 yards of cotton material or flannel
- matching thread
- sew-on velcro
- scissors
- sewing machine

Instructions:
1. Wash and dry both pieces of fabric.

2. Cut 24 6" by 11" rectangles out of both types of fabric. Set the extra fabric aside for the wet bag. If you want full-sheet sized towels, make your pieces 12" by 11" and only cut 12 of each fabric.

3. Match the rectangles up into pairs, one terry, one cotton. Place the printed side of the cotton face-up, pin together around the edges, then sew all of the way around the rectangles, leaving about a 1/8 allowance between the stitch and edge of the fabric.

4. Cut the velcro into 1" pieces. Lay the rectangle flat, cotton side up, short edges as top and bottom, and place two pieces of the same type of  velcro in the corners on the left side, one on the top corner, one on the bottom. Sew these on. Flip the towel over, place the opposite pieces of velcro in the corners on the left side of the terry cloth, sew on.

5. To make the wet bag, cut two 12" x 14" pieces of each type of fabric. Place one piece of terry cloth down, then a piece of cotton - print up on top of it. Set the other piece of cotton - face down onto the stack, then the other piece of terry cloth. Sew around 3 of the sides, then turn it inside out. Cut 4 16" x 3/4" strips of the cotton fabric. Roll each piece over onto itself 3 times, then sew it together. These will be the ties. Pin two ties into each side of the top of the bag. Sew the cotton to the terry around the top, securing the ties into the seem well.


6. Using an empty cardboard paper towel roll, mark where the velcro from the terry cloth side of the towels is. Glue the opposite type of velcro around the tube at both of the marks.

7. I had to rewash my towels at this point, since the terry cloth sheds a lot while cutting and sewing. If yours are ok, then you can attach your towels into a roll! Woohoo!


Monday, May 14, 2012

Homemade Composter

The hubs came up with this project idea while we were planning our garden for this summer. While our compost won't be ready to use this season, it will be a nutritious delight for our veggies next summer! This is an easy homemade composter made from some 2x4, a 5 gallon bucket with lid, L brackets, rollerblade wheels, and two thin poles. He constructed a rectangular base out of the 2x4s and drilled a few drainage holes in the bucket. Then he screwed L brackets into the inside of the bucket in 3 rows on diagonals. He put wheels on the poles with nuts to hold them in place and set them on top of the base. The bucket is placed on it's side and sealed with the lid. We give it a spin to stir it up every few days. There are a TON of resources for composting available through your local county extension. You need to have the right mix of green and brown materials for your compost to not smell terrible and be nutrient rich. Composting is a great way to keep some food waste out of the landfill and to boost your garden soil for free!


Coffee Cup Coozie

I saw this project idea on Pinterest and couldn't resist making my own version of it. I always recycle my coffee cup coozies after my coffeeStarbuck's beverage has been consumed, but having a reusable one, made from materials that I already have, seemed like a no-brainer. Reducing and reusing, while still feeding my coffee habit. These work great for hot and cold bevs! Store it in your car and you'll always be prepared for a caffeine fix.


Reusable Coffee Coozie
Materials:
- hair elastic
- large button
- cotton fabric (5" x 10")
- flannel fabric (5" x 10")
- pellon (4" x 9")
- marker
- cardboard coozie (to trace)
- iron
- scissors
- needle and thread or sewing machine


1. Lay cotton and flannel fabric out, printed side down. Break the seam on the cardboard coozie carefully, making sure not to rip it. Trace the cardboard coozie onto the fabric, adding about 1/4 inch extra around all sides. Cut it out. 


2. Trace the cardboard coozie onto the pellon, then cut it out. 


3. Lay the flannel down, place the pellon on top of it, then the cotton fabric on top of the pellon. Run the iron over the top until the pellon has fused to the fabric, then flip it over carefully and iron the flannel side as well. 


4. Zig-zag stitch hair elastic together in the center so that each end is in a loop. cup one of the loops off. Place the stitched end in between the fabric on one of the short sides so it is hidden, but the loop in hanging out. 


5. Fold the edges of the cotton and flannel in so that the rough edges are hidden. Sew them together all of the way around, sewing over the side with the elastic loop an extra time to secure it. 


6. Bend the coozie into a circle and overlap the edges by about 1/4-1/2 inch. Mark where the elastic reaches to without stretching with a sharpie. Sew the button on that dot. 


7. Enjoy a delish hot beverage from your favorite coffee shop with your new, stylish coozie.


Sunday, April 29, 2012

T-Shirt Dog Toy

My dog is a little ball of energy and personality. Actually, I'm not even sure that he is a dog some days. He's destroyed pretty much all of his toys except for the ones that can be used to play fetch with (convenient for him, since he's a fetch robot!). I refuse to buy him more chew toys since he ruins them in the first 5 minutes of ownership, so I thought that I would give making him one from a t-shirt a try. He's been chewing on it for the last little while, so I'd call it a win.


Recycled T-shirt Dog Toy
Materials:
- Scissors
- Old t-shirt (you could use one, or a few for different colors)
- Knot tying abilities

Directions:
1. Cut the old t-shirt into 1 inch think strips. I cut mine across from side to side. You'll want to cut at least 8 strips, but more than 8 would definitely make the toy better!

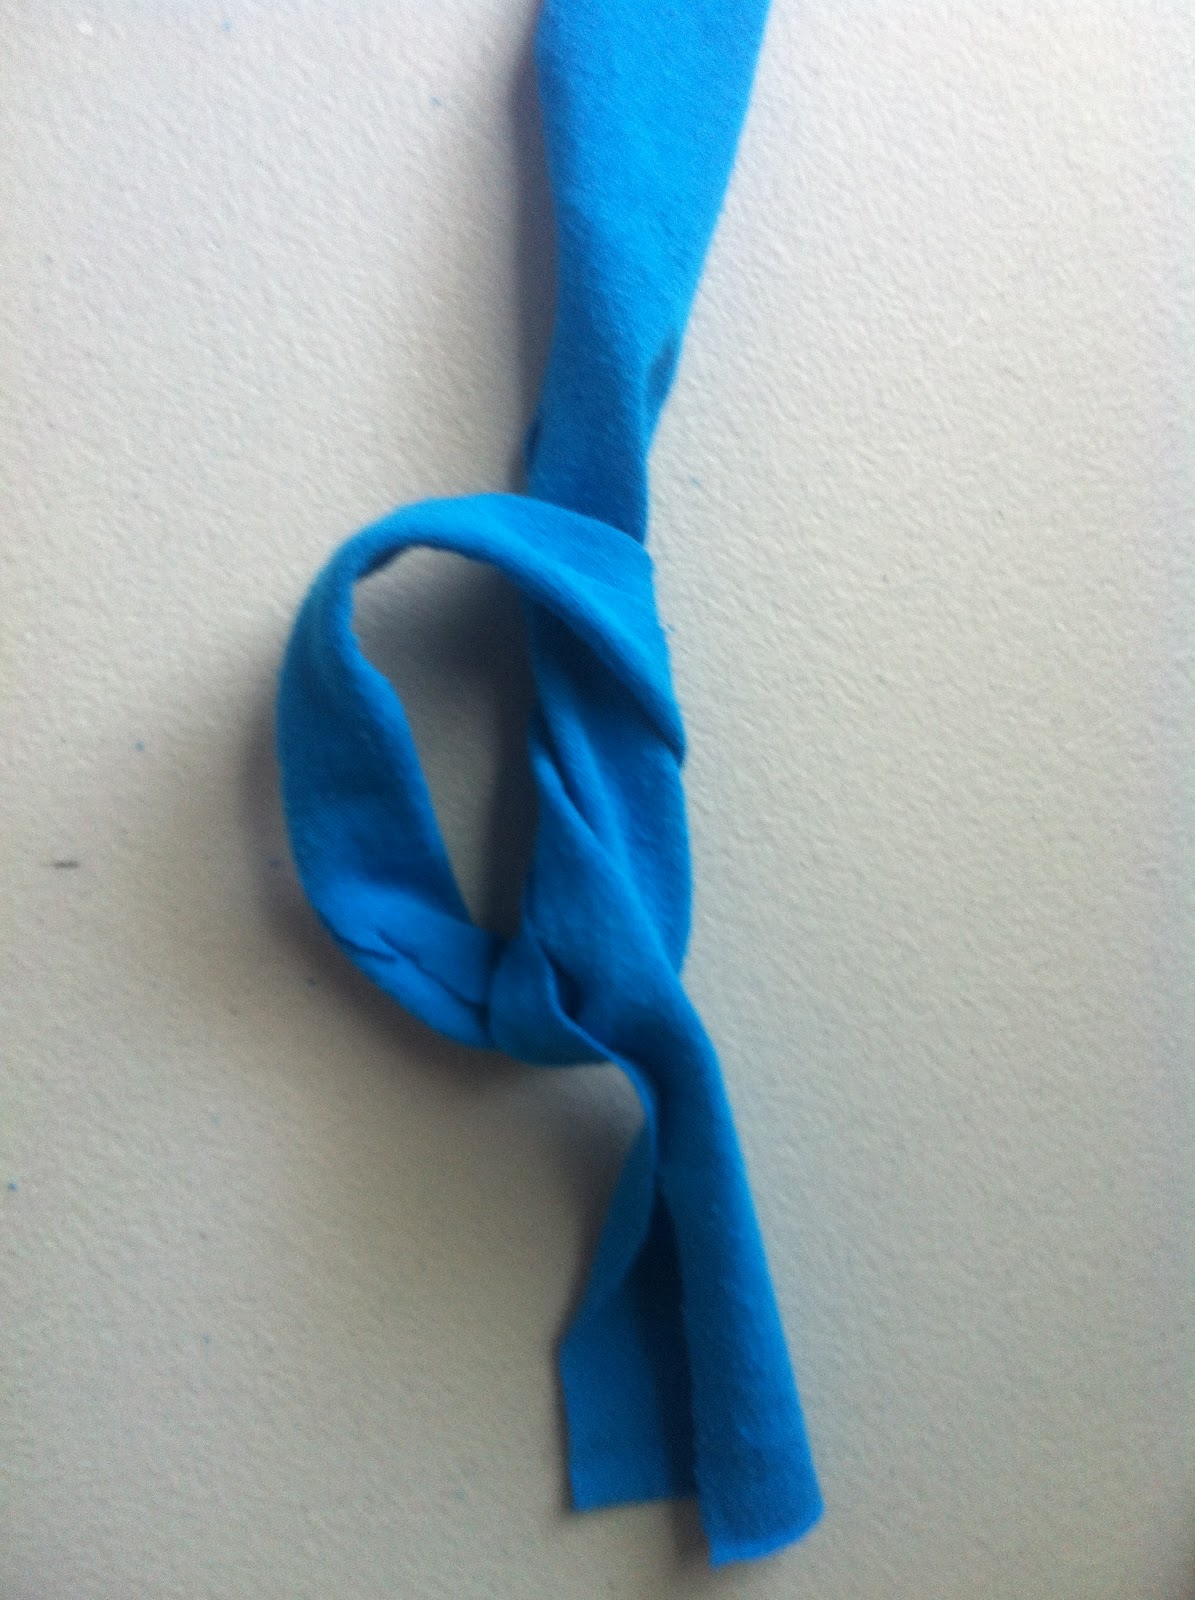
2. Take one strip, make it into a loop and tie a knot in it, leaving the loop.

3. Feed another strip through the loop from step 2, then tie it in a knot to secure it. 

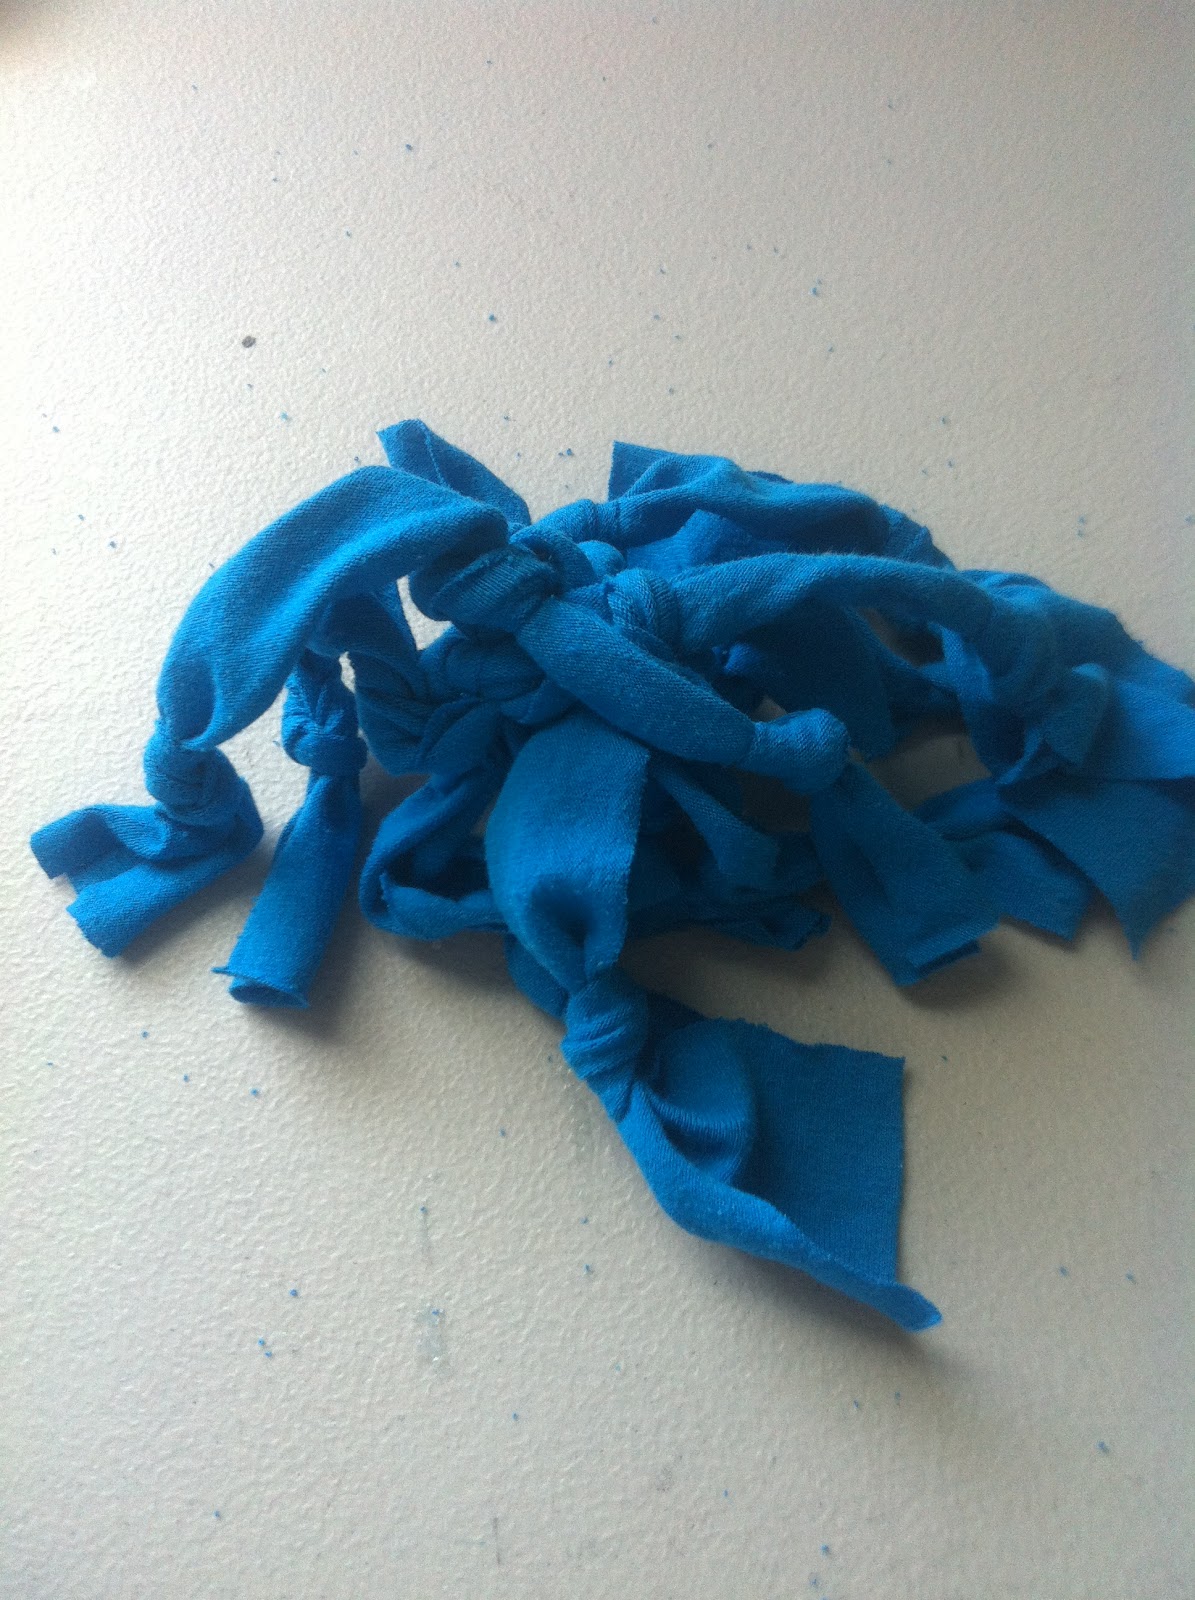
4. Feed the rest of the strips, one at a time, through the original loop, then tie a knot in each to secure it to the rest. It should kind of look like a ball where the knots are, with lots of tails hanging off. 

5. Tie a knot in each of the "tails." Dogs like to chew on knots, it's science. Well not really, but it will add interest to the toy. 

6. Give the toy to your dog and let it go to town chewing! 


This toy doesn't have an adorable face to rip off, but it serves it purpose. If your animal is anything like mine, this is a great alternative to a rope, which they eat the string out of and risk causing serious digestive track injuries. The best part, it's free. Who doesn't love a free dog toy?

Tuesday, April 10, 2012

A Few of My Favorite Things

I apologize for my brief hiatus from posting as the family and I were visiting our second family for the holiday. Needless to say, my project time has been very minimal for the last week so I figured I would find something else to post about. In my earlier years, I was an avid Oprah watcher (no judgment please) and I used to love her yearly 'favorite things' show. So, in honor of Earth Day coming up and my lack of project material, I'm going to share some of my favorite environmentally friendly products with you! Most of these are baby related since most of our recent purchases (i.e., the last year of my life) have been baby related. Enjoy and feel free to comment or ask me any questions about these 'favorite things'!

Favorite Little Green Things
Life Factory glass bottles - perfect for a water bottle, or as we are using, a sippy cup for a little one! And very durable! They come in lots of colors, different sizes and with different lid options (flip-top, sippy cup, flat top and baby bottle) http://www.lifefactory.com/

Green Toys - We scored some recycled milk carton, BPA free feeding spoons for our baby bear, but they have tons of choices for feeding and toys! In addition to being eco-friendly, they are made in the USA! http://greentoys.com/index.html


Seventh Generation and Method cleaning products - Before I switched to the old fashioned vinegar and baking soda cleaning methods, I was obsessed with Method and Seventh Gen products (still am!). I still use 7th Gen dish soap and Method hand soap, but all of their products seem to work very well. http://methodhome.com/


Vulli Toys - If you have a baby or even a niece or nephew that's an infant, these teething rings rock!! They are made from natural rubber, 100% BPA and phosphate free! Baby bear loves hers! http://www.sophiegiraffeusa.com/index.html


Camelbak Groove - This is the best water bottle I have ever owned. It has a built in filter and a straw, what could be better? The bottles are BPA free and the replacement filters are very affordable. If you don't already own a reusable water bottle, you should definitely make this yours! http://www.camelbak.com/


Thursday, March 1, 2012

Tips for Sustainable Living - Baking Soda

Go ask your grandmother what she used to clean her house with before all of the commercial cleaners that we have today were available. I'll bet she'll say baking soda, among other products. I saw a pin on Pinterest that showed an oven door pre- and post-baking soda cleaning. By George, baking soda actually took the gunk off! Here's the deal, the cleaners that you find on a grocery store shelf are there because we are, as a society, extremely lazy. Harsh chemicals take the "work" out of cleaning, reducing the need for putting some extra elbow grease into cleaning. So, if you decide to use baking soda or vinegar as cleaning products, be aware that it will take some extra work on your part to yield the same results. But hey, some good hard scrubbing might be beneficial to you too by burning some extra calories! Good for the environment, good for the wallet, good for your body!

I've recently started using baking soda in my cleaning tasks. Combined with a little bit of vinegar (a la elementary school science fair volcano style) it can be very powerful. Just ask my mildewy shower door track. Add a little bit of water to some baking soda to make a paste and you have a powerful scrub! Here are some ideas of where you can use baking soda in your home:


- Clean the inside of your dirty oven. Create a baking soda paste and SCRUB. I tried this in my oven after an unfortunate lasagna explosion last month left me choking on an aerosol oven cleaner. I didn't want to suffocate, so I tossed the can aside and made a baking soda paste. It took some serious scrubbing, but my oven was baked on tomato sauce free!
- Dinner stuck to your pots and pans while it was cooking but you don't want to scratch your pans trying to remove the stuck on food? Baking soda paste and SCRUB. Pretty sure this trick has saved me from being banned from using our new pots and pans!
- Dog peed on the carpet? Drop some baking soda on it with a little bit of water, scrub it and let it dry. Drop some dry baking soda on the spot, let it sit for a few hours then vacuum it up. No stain, no pee smell. it's a win for everyone.
- Ceramic oven top with charred on food/liquids? This is a daily occurrence in my house. Baking soda paste and scrub. Works like a charm.
- Husband's shoes or work clothes stinking up your closet? Open up a small box of baking soda and stick it in a corner of the closet. It will absorb the bad smell. This works for fridges too. Heck, it works pretty much everywhere.
- Dirty toilet bowl. Drop baking soda on the edges, scrub with toilet brush. Flush. Done.
- Bathroom or kitchen counter has stuck on nastiness? Baking soda paste and scrub.
- Bee sting? Remove the stinger first (if it's in there), and assuming that the stingee isn't allergic to bees and doesn't need to go to the ER, make a baking soda paste and apply it to the sting. Let it dry completely, then wash it off gently under running water. It takes the sting away from the skin and makes your 7 year old summer camp kids stop crying.

There are SO many uses for baking soda other than baking, and since it's very inexpensive AND completely non-toxic, it's kind of a no brainer. Do yourself and the environment a favor and use some baking soda to do the job. 


Saturday, January 21, 2012

Tips for Sustainable Living - Vinegar

Lately, it seems like "green" is all the rage. The words "organic," "eco," and "natural" are popping up on products everywhere. Little do most consumers know, there are no standards or guidelines for content in a product to be able to be labeled with one of these deceivingly attractive words. Be a smart consumer and read the ingredients in these products, then decide for yourself if the product is really "natural," or if it is just being labeled as such because it has a few natural ingredients mixed in with the artificial. Some of the worst offenders in this new, misleading trend are cleaning products. We only use cleaning products which are derived from 100% plant based materials and are biodegradable, but I've quickly learned that household white vinegar can be used for the exact same tasks and is much more budget friendly. Vinegar is a totally natural, ecologically friendly and sustainable substance. It can be diluted with water to different concentrations for different uses. The pungent smell dissipates quickly, so don't let that keep you away from tapping this 99% antifungal, 95% antibacterial product.


Some ideas for using vinegar around your house in place of harsh chemicals:

  •  Equal parts vinegar and water mixed in a spray bottle make a great all-purpose cleaner. I use this in my bathroom on all surfaces, in the kitchen on the counters, to clean my linoleum floors, and even to sanitize Baby Bear's toys (which I rinse the crap out of afterwards to remove any remnants so she doesn't taste it).
  •  Hard water? Remove limescale with vinegar. Either soak the item in pure vinegar or pour some pure vinegar on the area, then scrub and rinse thoroughly with water. I did this on our shower doors and track to get the mildew and build up from the previous tenants off. I also use pure vinegar to descale my coffee maker, tea pot, and Baby Bear's bottle warmer. 
  • A dilution of 1 part vinegar, 2 parts water can also be used to wash dirty walls, baseboards, windows, and blinds. This worked great to clean our rental house (I have before and after pictures if anyone wants to see them), and it was a thrifty and safer alternative to chemical products like Mr. Clean.
  • Soaking paint brushes in vinegar will also remove any paint or sticky residue. I tend to forget to rinse them out after projects, so I refresh my brushes with an overnight vinegar soak.
The possibilities for vinegar are endless. The best part - it's safe to put into our sewer systems. Next time you're in the cleaning product aisle picking up a new bottle of 409 or Scrubbing Bubbles, think about if you could use white vinegar to do the same task instead. Priced at about $3 per gallon, you'll save yourself money while minimizing your ecological footprint on the earth.