
Monday, May 14, 2012
Homemade Composter
The hubs came up with this project idea while we were planning our garden for this summer. While our compost won't be ready to use this season, it will be a nutritious delight for our veggies next summer! This is an easy homemade composter made from some 2x4, a 5 gallon bucket with lid, L brackets, rollerblade wheels, and two thin poles. He constructed a rectangular base out of the 2x4s and drilled a few drainage holes in the bucket. Then he screwed L brackets into the inside of the bucket in 3 rows on diagonals. He put wheels on the poles with nuts to hold them in place and set them on top of the base. The bucket is placed on it's side and sealed with the lid. We give it a spin to stir it up every few days. There are a TON of resources for composting available through your local county extension. You need to have the right mix of green and brown materials for your compost to not smell terrible and be nutrient rich. Composting is a great way to keep some food waste out of the landfill and to boost your garden soil for free!

Coffee Cup Coozie
I saw this project idea on Pinterest and couldn't resist making my own version of it. I always recycle my coffee cup coozies after my coffeeStarbuck's beverage has been consumed, but having a reusable one, made from materials that I already have, seemed like a no-brainer. Reducing and reusing, while still feeding my coffee habit. These work great for hot and cold bevs! Store it in your car and you'll always be prepared for a caffeine fix.
Reusable Coffee Coozie
Materials:
- hair elastic
- large button
- cotton fabric (5" x 10")
- flannel fabric (5" x 10")
- pellon (4" x 9")
- marker
- cardboard coozie (to trace)
- iron
- scissors
- needle and thread or sewing machine
1. Lay cotton and flannel fabric out, printed side down. Break the seam on the cardboard coozie carefully, making sure not to rip it. Trace the cardboard coozie onto the fabric, adding about 1/4 inch extra around all sides. Cut it out.

2. Trace the cardboard coozie onto the pellon, then cut it out.
3. Lay the flannel down, place the pellon on top of it, then the cotton fabric on top of the pellon. Run the iron over the top until the pellon has fused to the fabric, then flip it over carefully and iron the flannel side as well.


4. Zig-zag stitch hair elastic together in the center so that each end is in a loop. cup one of the loops off. Place the stitched end in between the fabric on one of the short sides so it is hidden, but the loop in hanging out.
5. Fold the edges of the cotton and flannel in so that the rough edges are hidden. Sew them together all of the way around, sewing over the side with the elastic loop an extra time to secure it.
6. Bend the coozie into a circle and overlap the edges by about 1/4-1/2 inch. Mark where the elastic reaches to without stretching with a sharpie. Sew the button on that dot.
7. Enjoy a delish hot beverage from your favorite coffee shop with your new, stylish coozie.

Monday, May 7, 2012
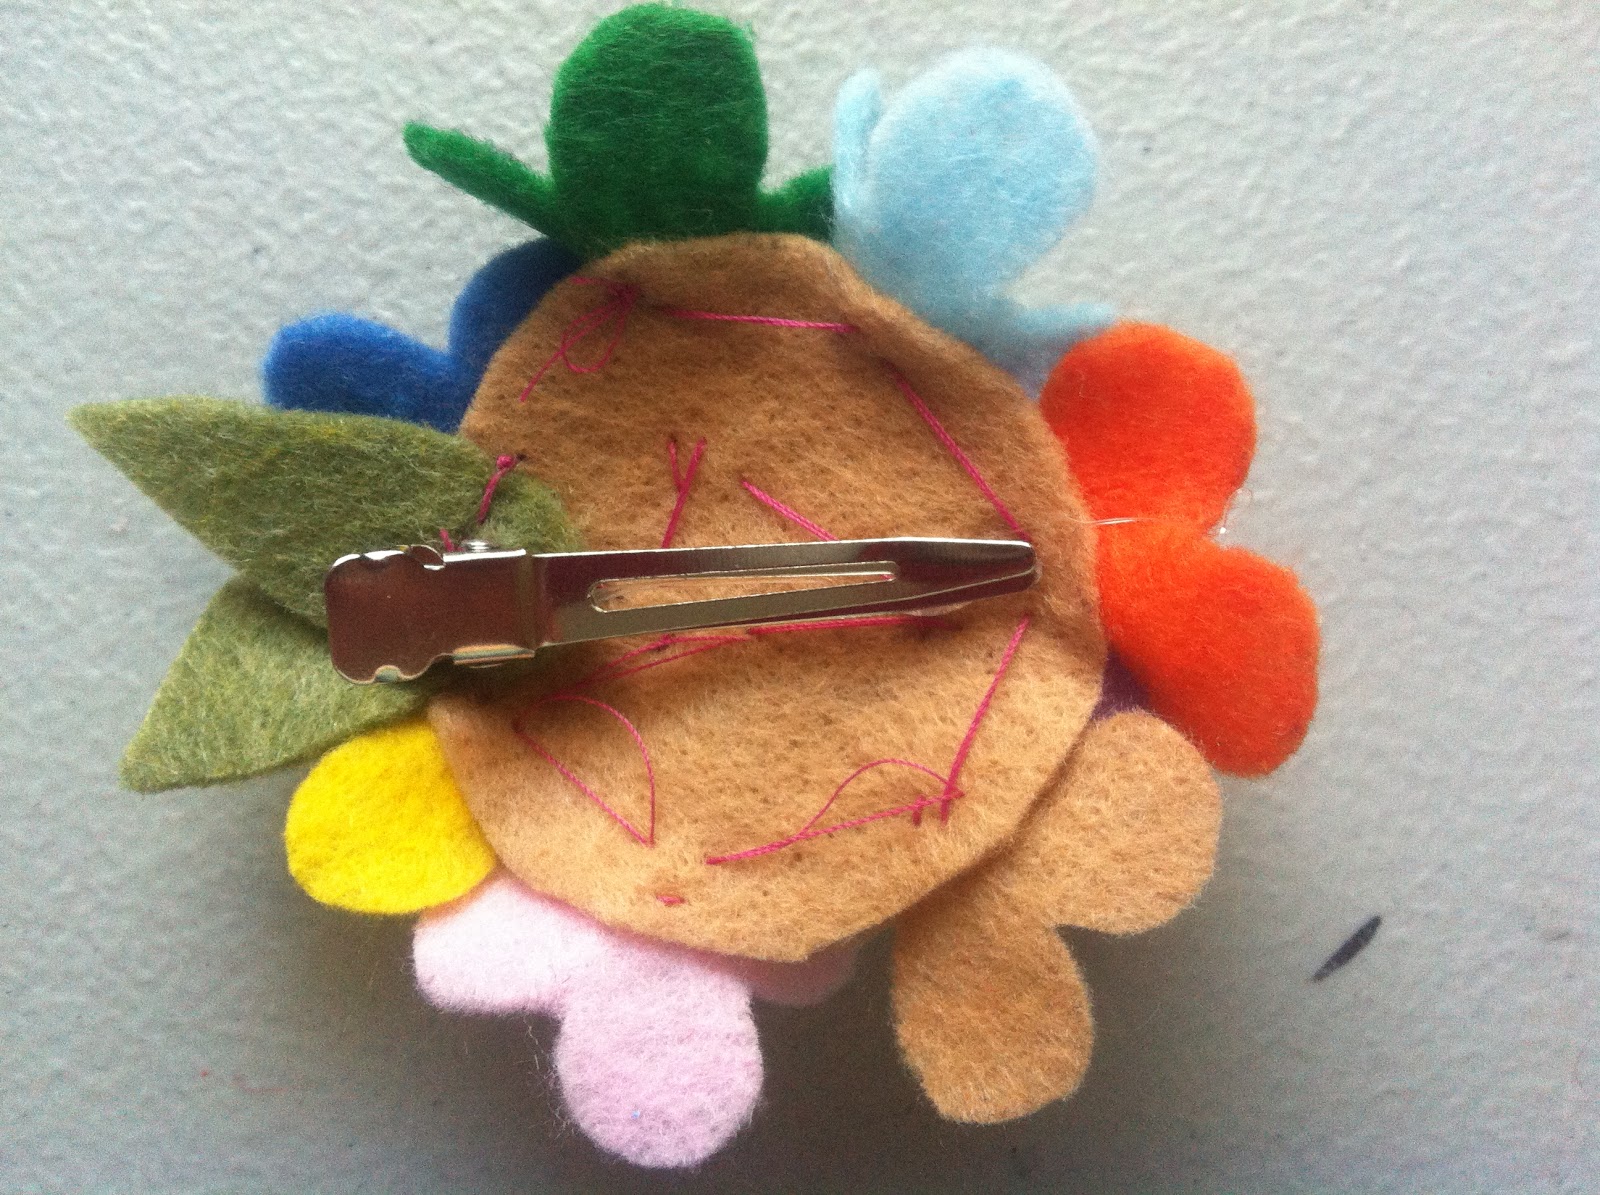
Hydrangea Hair Bow
Now that we're well into spring, its warm enough for baby bear to wear her colorful spring and summer clothes. A new wardrobe calls for new hair bows!! I still have a TON of left over felt from the quiet book project so I decided that the new accessories would be felt flowers. I'll post another type of felt flower that I made later when I have an extra few minutes!


Felt Hydrangea Hair Clip
Materials:
- Felt, green and another color (one or more colors, depending on what color combination you want)
- Alligator clip
- needle and thread
- scissors
- flower stencil or artistic skill
- hot glue
1. Trace or freehand a four petal flower onto the felt. You will want about 12-14 individual flowers total. Cut the flowers out.
2. Cut a circle out of the felt, about 3" in diameter. Also cut 2-3 one inch long leaves out of some green felt.
3. Sew each flower onto the circle by sewing a small x in the center of the flower. Some flowers will have to be squished and overlap a little bit, but that's ok. It will give the whole flower a final look.
4. Sew the leaves onto the back of the flower, letting them peek out from behind the flowers as much or little as you like.
5. Using hot glue, attach the alligator clip. Or, to make this a head band, sew the flower onto a stretchy head band, then glue a piece of felt onto the back to secure the flower to the head band.

Thursday, May 3, 2012
Fabric Bin
I was doing laundry the other day and managed to knock one of the many random things that have found their way onto the top of my washer behind it. Our laundry room is the walkway into the garage, so the washer has become home to everything and anything that would go from garage to house and back. After spending 5 minutes reaching behind the washer to retrieve it and being terrified of what kind of pest was going to jump out at me (unfortunately we have more than just dust bunnies lurking in dark places), I decided that this scenario didn't need to be repeated. Luckily, I had a shoe box and a fat quarter of fabric hanging around to make a fabric bin to wrangle all of the random stuff that finds its way onto the washer. This literally took me five minutes to make and is a great organizational tool!
DIY Fabric Bin
Materials:
- shoe box
- hot glue
- fabric (I used a fat quarter because it was the right size for my box)
- scissors, if you need to cut the fabric

Directions:
1. Remove the lid from the shoe box. If lid is attached like mine was, cut the lid and any other flaps off.

2. Lay the fabric out, printed side facing down. Set the box in the middle of it and test folding the fabric up the sides to make sure there will be enough and that the box is positioned correctly.

3. Spread hot glue on the bottom of the box and carefully smooth the fabric over it. Spread glue on one side of the box, then pull the fabric up over it, smoothing out any wrinkles. Repeat for all four sides. There should be some overlap to go into the box, glue that down inside of the box, one side at a time.

Ta-da!


Subscribe to:
Posts (Atom)