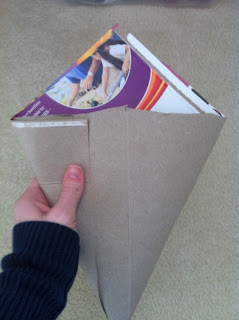
What you'll need:
- Cardboard (I used a cereal box and got a 12" tree, so bigger box if you want a larger tree, smaller box for a smaller tree)
- Yarn/twine/something in the string family
- Modpodge
- Scissors
- Elmer's glue
- Paper clip/Binder clip
How to:
1. Cut open your box so it lays completely flat.
2. Cut off all of the little tab edges so you have a clean rectangle.
3. Fold two of the corners toward each other, keeping the printed side of the box to the inside and roll the rectangle into a cone.
4. Unless you're an origami genius, you probably have a tail on the bottom of your cone like I ended up with. Cut that tail off and cut around the base of the cone so that you have an even base.
5. Using your binder clip or heavy duty paper clip, secure the cone. Spread some glue into the seam, covering the whole height of the cone, and let it dry.
6. Spread some modpodge around the base of the cone and start wrapping your spring around, pressing it into the modpodge and making sure that the edges of the string are touching with each layer you add. Keep adding modpodge and string until the entire cone has been wrapped.
7. Cut the string from the ball/spool about 4" from where it ends on the cone to leave a tail. Put the tail through the little opening at the top.
8. You should see the tail inside of the cone, hanging like this.
9. Ta-da! Let the tree dry for a few hours and go peel the 8 extra layers of glue "skin" off of your fingers.
I added a snowflake button to the top of mine to hide the lumpy top. Cone tree found a nice home next to my sticks in a vase with fake cranberries, our snowman candle from Holland House Candles and a snowman figurine my mom donated to the cause a few years ago. PS: whoever designed the dry bar in my house obviously was male because it's SO awkward and impossible to decorate nicely.


