Showing posts with label Sustainability. Show all posts

Tuesday, December 11, 2012

Cone Christmas Tree Made From Recycled Cardboard

If any of you use Pinterest, you've probably seen the super adorable cone Christmas trees all over it. I saw some last year and thought they were neat, but after looking at the cardboard cones at Hobby Lobby and seeing that they're kind of expensive for this project, I decided that if I wanted to make a cone tree, I better figure out how to make my own cone to use. Luckily I had some practice making cones (I'll post the project later) for baby bear's first birthday party hats. Being an avid recycler and tree-hugger, I have a bunch of boxboard hanging around in "limbo," waiting to be taken to the recycling center. Bam. Free cone. Here's the scoop:

What you'll need:
- Cardboard (I used a cereal box and got a 12" tree, so bigger box if you want a larger tree, smaller box for a smaller tree)
- Yarn/twine/something in the string family
- Modpodge
- Scissors
- Elmer's glue
- Paper clip/Binder clip

How to:
1. Cut open your box so it lays completely flat.

2. Cut off all of the little tab edges so you have a clean rectangle.


3. Fold two of the corners toward each other, keeping the printed side of the box to the inside and roll the rectangle into a cone. 


4. Unless you're an origami genius, you probably have a tail on the bottom of your cone like I ended up with. Cut that tail off and cut around the base of the cone so that you have an even base. 


5. Using your binder clip or heavy duty paper clip, secure the cone. Spread some glue into the seam, covering the whole height of the cone, and let it dry. 


6. Spread some modpodge around the base of the cone and start wrapping your spring around, pressing it into the modpodge and making sure that the edges of the string are touching with each layer you add. Keep adding modpodge and string until the entire cone has been wrapped.

7. Cut the string from the ball/spool about 4" from where it ends on the cone to leave a tail. Put the tail through the little opening at the top.
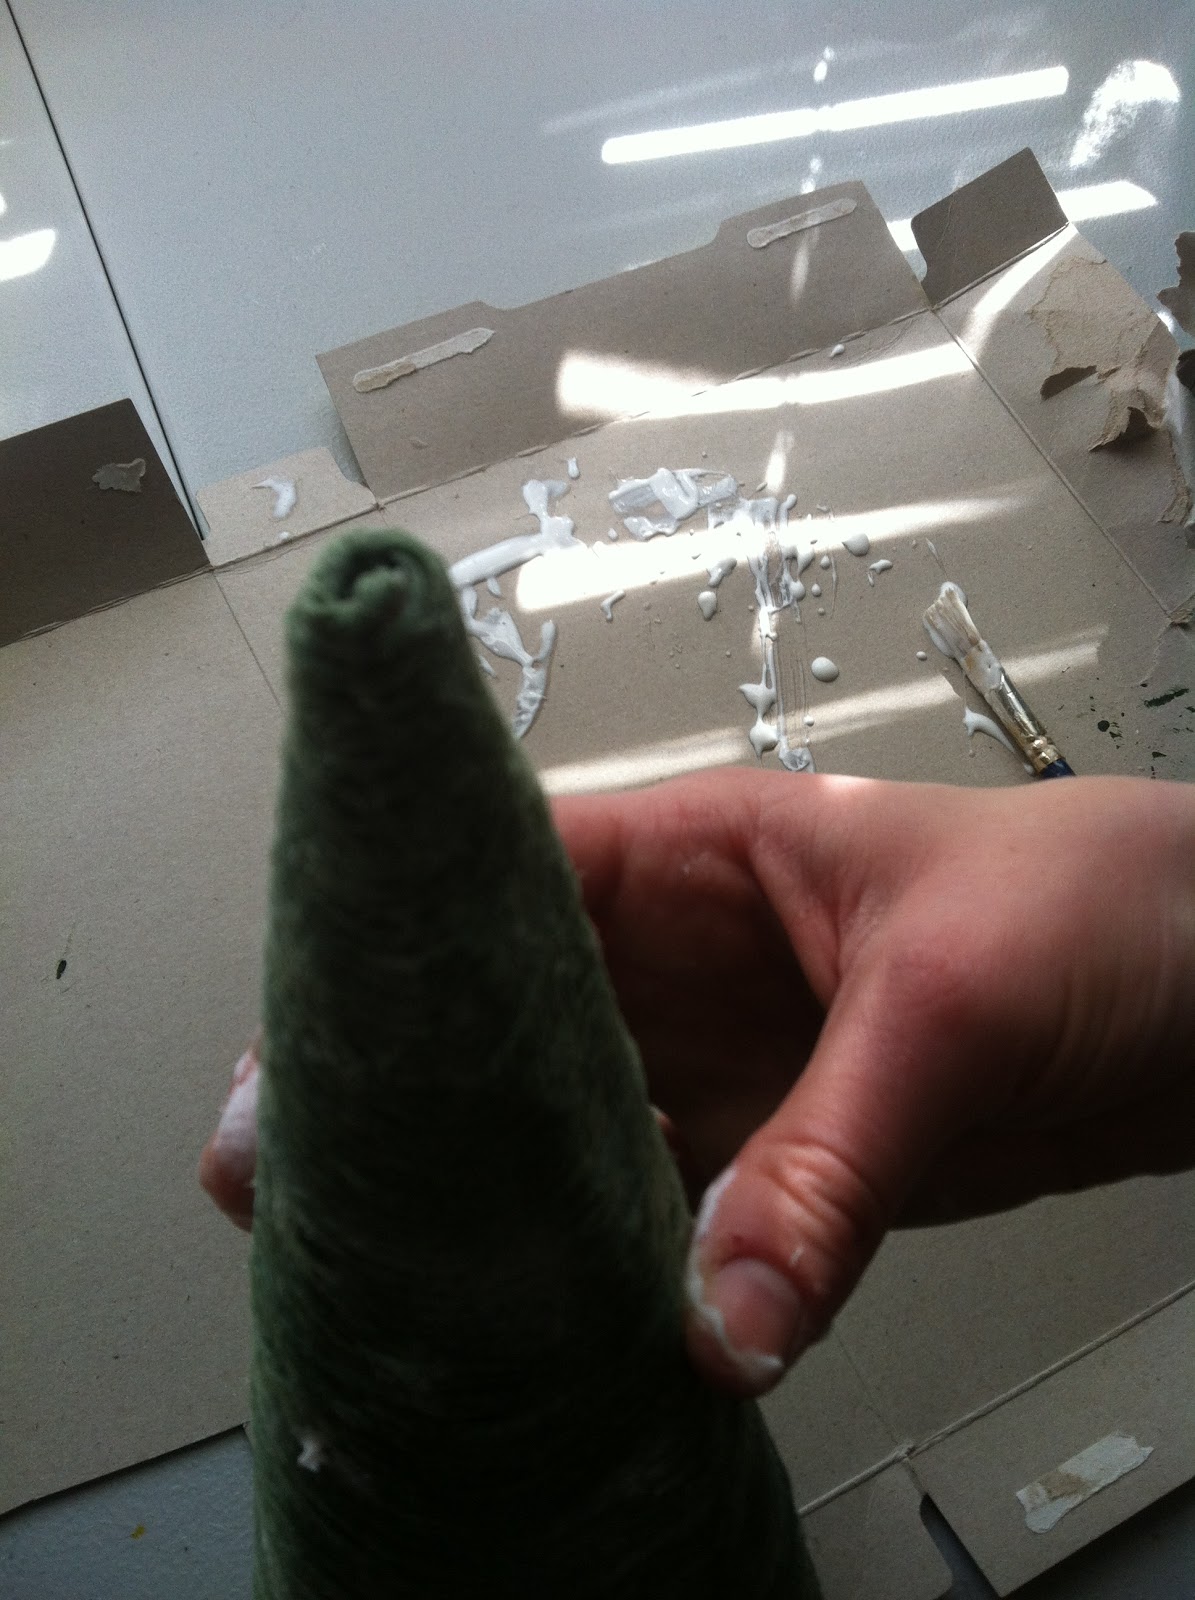
8. You should see the tail inside of the cone, hanging like this.


9. Ta-da! Let the tree dry for a few hours and go peel the 8 extra layers of glue "skin" off of your fingers. 


I added a snowflake button to the top of mine to hide the lumpy top. Cone tree found a nice home next to my sticks in a vase with fake cranberries, our snowman candle from Holland House Candles and a snowman figurine my mom donated to the cause a few years ago. PS: whoever designed the dry bar in my house obviously was male because it's SO awkward and impossible to decorate nicely.


Tuesday, November 27, 2012

Pinecone Christmas Trees

This might be the easiest project ever. It would be great to do with kids, too. Take them on a pinecone hunt to find the supplies!

What you'll need:
- Pinecones (flat bottomed pinecones work best for this project since they will need to stand up on their own)
- Cardboard (boxboard from a cereal box works great for this)
- Marker (I used a metallic marker)
- Glue (Elmer's works fine)

How to:
1. Draw a star on the non-printed side of your cardboard. Fold the cardboard in half and cut out the star so that you cut two identical stars at once. Glue the printed sides of the cardboard together and let dry.
2. Color both sides of the star with the marker, making sure to color the edges too. 
3. Place star on top of pinecone, glue it on or just let it sit free. 

I added fake cranberries to one of my "trees," so things like sequins, glitter, gemstones, etc. would make fun personalized touches! 


Thursday, June 7, 2012

Reusable "Paper" Towel

Between having a baby, dog and husband, I use lots of paper towel to clean up messes. To be fair, I'm probably the worst offender with the kitchen mess making, especially when the blender is involved in the project. When I realized that we're literally using a roll a week, which is unbelievably wasteful, I decided that it was time to do something about it. Pinterest yet again delivered with ideas for reusable paper towel, modified to meet my needs :) Since my needs usually call for a half-sheet of paper towel, I made mine in half-sheet size. I finished this project early this week and started using the cloth towels, and let me tell you, they ROCK. One sheet of Bounty doesn't have anything on terry cloth! I also made a wet bag to hang on my stove and collect the dirty towels until it's time to wash them.


Reusable Paper Towel
Materials:
- 1 1/2 yards of terry cloth material
- 1 1/2 yards of cotton material or flannel
- matching thread
- sew-on velcro
- scissors
- sewing machine

Instructions:
1. Wash and dry both pieces of fabric.

2. Cut 24 6" by 11" rectangles out of both types of fabric. Set the extra fabric aside for the wet bag. If you want full-sheet sized towels, make your pieces 12" by 11" and only cut 12 of each fabric.

3. Match the rectangles up into pairs, one terry, one cotton. Place the printed side of the cotton face-up, pin together around the edges, then sew all of the way around the rectangles, leaving about a 1/8 allowance between the stitch and edge of the fabric.

4. Cut the velcro into 1" pieces. Lay the rectangle flat, cotton side up, short edges as top and bottom, and place two pieces of the same type of  velcro in the corners on the left side, one on the top corner, one on the bottom. Sew these on. Flip the towel over, place the opposite pieces of velcro in the corners on the left side of the terry cloth, sew on.

5. To make the wet bag, cut two 12" x 14" pieces of each type of fabric. Place one piece of terry cloth down, then a piece of cotton - print up on top of it. Set the other piece of cotton - face down onto the stack, then the other piece of terry cloth. Sew around 3 of the sides, then turn it inside out. Cut 4 16" x 3/4" strips of the cotton fabric. Roll each piece over onto itself 3 times, then sew it together. These will be the ties. Pin two ties into each side of the top of the bag. Sew the cotton to the terry around the top, securing the ties into the seem well.


6. Using an empty cardboard paper towel roll, mark where the velcro from the terry cloth side of the towels is. Glue the opposite type of velcro around the tube at both of the marks.

7. I had to rewash my towels at this point, since the terry cloth sheds a lot while cutting and sewing. If yours are ok, then you can attach your towels into a roll! Woohoo!


Saturday, June 2, 2012

Eating "Fresh"

This post isn't about a project, but is about my opinion on food. Stop reading if you don't want to hear my opinion, otherwise, thanks for listening :)

 Lately, I've gotten into a ton of discussions with people about what kind of food they eat and how either processed food is the devil or the inexpensive solution to feeding a growing family. It doesn't matter which side of the fence you're on regarding this issue, but here's the bottom line: there's food revolution going on in our country. People need to educate themselves with factual information and stop blindly following everything that they see on the news or the internet. Yes, fresh food is definitely healthier for you. Is organic necessarily better? That's your personal opinion, in my opinion. I don't think that we eat very much processed food at my house. An outsider would probably come in, look at my pantry, and beg to differ. True, there are lots of boxed and canned items in my pantry, but after looking closer, you'd see that it's all raw ingredients. Sugar, flour, rice, pasta, etc. Of course there are things like cereal and tortilla chips, but I don't feed my family "convenience foods" like frozen pizza or TV dinners. We literally make everything from scratch. Breakfast muffins? Scratch. Granola? Scratch. Spanish rice? Scratch. Every single lunch and dinner, baby food, and dessert - from scratch. Sure, the ingredients were processed, but compare the little bit the raw ingredients are processed to how much a boxed mix of brownies is. It's a no-brainer.
I've also been hearing that vegetables are expensive. I will agree with this to some extent, but the fact is, when you buy things in season (ie, asparagus in the spring time or apples in the fall), that's when the price is lowest. Eating produce when it is in season is sustainable and cost effective. Don't believe me? We just got 20 lbs of blueberries for $2.50 a pound because they are in season. Compare that to a pint for $3.99 in January. Vegetables are an investment, but they stretch mush further because they FILL YOU UP. You'd be amazed by how far a few single veggies can go. $25 worth of produce will feed us for a week, eating veggies as a side dish or main dish for every meal. If that isn't bang for your buck, I don't know what is.

Moral of the story, if you want to feed your family less processed food, start with buying more produce and more raw ingredients. Making things from scratch is time consuming, but I'm 100% convinced that it's saved us majorly on our grocery bill.

Monday, May 14, 2012

Homemade Composter

The hubs came up with this project idea while we were planning our garden for this summer. While our compost won't be ready to use this season, it will be a nutritious delight for our veggies next summer! This is an easy homemade composter made from some 2x4, a 5 gallon bucket with lid, L brackets, rollerblade wheels, and two thin poles. He constructed a rectangular base out of the 2x4s and drilled a few drainage holes in the bucket. Then he screwed L brackets into the inside of the bucket in 3 rows on diagonals. He put wheels on the poles with nuts to hold them in place and set them on top of the base. The bucket is placed on it's side and sealed with the lid. We give it a spin to stir it up every few days. There are a TON of resources for composting available through your local county extension. You need to have the right mix of green and brown materials for your compost to not smell terrible and be nutrient rich. Composting is a great way to keep some food waste out of the landfill and to boost your garden soil for free!


Tuesday, April 3, 2012

Tips for Sustainable Living - Recycling Made Easy

It's official - I've been bit by the spring cleaning bug. Between the baby being mobile and needing to rearrange to make our home safer for her and everyday living, I have a list that will probably take me a few weeks to get through. As I clean out, I try to make sure that I am recycling as much as possible, whether that means taking it to the recycling center or reusing it in my home for another purpose. I have a pretty simple, yet effective system in my home that makes it easy for the hubs, myself and even our guests to recycle.

Stage 1: Collection Containers
I found these simple recycling bags at Ikea a few years ago (still available, even online!) that snap together to form a 3-section unit or can be used independently. In order to make it easy for everyone to see that we recycle and know where to put said recyclables, I have placed one of these bags next to the garbage can in my kitchen. There is also one in our office and another in the laundry room that is specifically meant to hold plastic and paper shopping bags.

Here's the bag in my kitchen:


Office:

These bags work great for inside collection! Any container would work, just make sure to clearly designate it as the recycling container. Placing recycling next to frequently used trash cans will increase how much you recycle in your home. Places like the kitchen, office and garage are great candidates for a recycling center!

Stage 2: Outdoor Holding Container
In addition to indoor containers to collect recyclables, we also have a can outside that we put anything that held food in. I rinse the containers out very well so I have never found a bug in my recycling can. We use a regular trash can with a lid to hold our recyclables, since we have to take them ourselves to the local collection site. To make things even easier and greener, I use an old mesh laundry bag from college instead of a trash bag to line the can. When I head over to the recycling center, all I have to do is pull the bag out of the can and dump the items into the big bins. The bag is washable and is saving plastic from garbage bags!  


I actively try to recycle as much as possible. I'm proud to say that my household generates only one bag of trash per week. We also compost our produce scraps, cutting down the stink inside our trash can and allowing us to use only one trash bag per week. It was a pretty easy commitment to make and keep up with. Once you start, the recycling habit will come very easily! 

"Unless someone like you cares a whole awful lot, nothing's going to get better. It's not." 
- Dr. Seuss

Saturday, January 21, 2012

Tips for Sustainable Living - Vinegar

Lately, it seems like "green" is all the rage. The words "organic," "eco," and "natural" are popping up on products everywhere. Little do most consumers know, there are no standards or guidelines for content in a product to be able to be labeled with one of these deceivingly attractive words. Be a smart consumer and read the ingredients in these products, then decide for yourself if the product is really "natural," or if it is just being labeled as such because it has a few natural ingredients mixed in with the artificial. Some of the worst offenders in this new, misleading trend are cleaning products. We only use cleaning products which are derived from 100% plant based materials and are biodegradable, but I've quickly learned that household white vinegar can be used for the exact same tasks and is much more budget friendly. Vinegar is a totally natural, ecologically friendly and sustainable substance. It can be diluted with water to different concentrations for different uses. The pungent smell dissipates quickly, so don't let that keep you away from tapping this 99% antifungal, 95% antibacterial product.


Some ideas for using vinegar around your house in place of harsh chemicals:

  •  Equal parts vinegar and water mixed in a spray bottle make a great all-purpose cleaner. I use this in my bathroom on all surfaces, in the kitchen on the counters, to clean my linoleum floors, and even to sanitize Baby Bear's toys (which I rinse the crap out of afterwards to remove any remnants so she doesn't taste it).
  •  Hard water? Remove limescale with vinegar. Either soak the item in pure vinegar or pour some pure vinegar on the area, then scrub and rinse thoroughly with water. I did this on our shower doors and track to get the mildew and build up from the previous tenants off. I also use pure vinegar to descale my coffee maker, tea pot, and Baby Bear's bottle warmer. 
  • A dilution of 1 part vinegar, 2 parts water can also be used to wash dirty walls, baseboards, windows, and blinds. This worked great to clean our rental house (I have before and after pictures if anyone wants to see them), and it was a thrifty and safer alternative to chemical products like Mr. Clean.
  • Soaking paint brushes in vinegar will also remove any paint or sticky residue. I tend to forget to rinse them out after projects, so I refresh my brushes with an overnight vinegar soak.
The possibilities for vinegar are endless. The best part - it's safe to put into our sewer systems. Next time you're in the cleaning product aisle picking up a new bottle of 409 or Scrubbing Bubbles, think about if you could use white vinegar to do the same task instead. Priced at about $3 per gallon, you'll save yourself money while minimizing your ecological footprint on the earth.